Showing posts with label Debian. Show all posts

Saturday, 31 March 2012

How to secure a LAMP server on CentOS or RHEL

LAMP is a software stack composed of Linux (an operating system as a base layer), Apache (a web server that "sits on top" of the OS), MySQL (or MariaDB, as a relational database management system), and finally PHP (a server-side scripting language that is used to process and display information stored in the database).
 
In this article we will assume that each component of the LAMP stack is already up and running, and will focus exclusively on securing the LAMP server(s). We must note, however, that server-side security is a vast subject, and therefore cannot be addressed adequately and completely in a single article.
 
In this post, we will cover the essential must-do's to secure each part of the stack.

Securing Linux

Since you may want to manage your CentOS server via ssh, you need to consider the following tips to secure remote access to the server by editing the /etc/ssh/sshd_config file.
 
1) Use key-based authentication, whenever possible, instead of basic authentication (username + password) to log on to your server remotely. We assume that you have already created a key pair with your user name on your client machine and copied it to your server.
 
1
2
3
PasswordAuthentication no
RSAAuthentication yes
PubkeyAuthentication yes

2) Change the port where sshd will be listening on. A good idea for the port is a number higher than 1024:
 
1
Port XXXX
3) Allow only protocol 2:
1
Protocol 2

4) Configure the authentication timeout, do not allow root logins, and restrict which users may login, via ssh:
1
2
3
LoginGraceTime 2m
PermitRootLogin no
AllowUsers gacanepa

5) Allow only specific hosts (and/or networks) to login via ssh:
In the /etc/hosts.deny file:
1
sshd: ALL

In the /etc/hosts.allow file:
1
sshd: XXX.YYY.ZZZ. AAA.BBB.CCC.DDD

where XXX.YYY.ZZZ. represents the first 3 octets of an IPv4 network address and AAA.BBB.CCC.DDD is an IPv4 address. With that setting, only hosts from network XXX.YYY.ZZZ.0/24 and host AAA.BBB.CCC.DDD will be allowed to connect via ssh. All other hosts will be disconnected before they even get to the login prompt, and will receive an error like this:


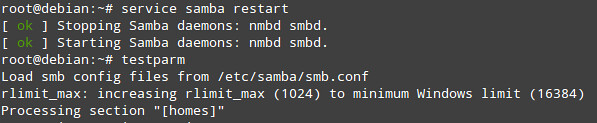
(Do not forget to restart the sshd daemon to apply these changes: service sshd restart).
We must note that this approach is a quick and easy -but somewhat rudimentary- way of blocking incoming connections to your server. For further customization, scalability and flexibility, you should consider using plain iptables and/or fail2ban.

Securing Apache

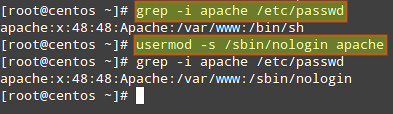
1) Make sure that the system user that is running Apache web server does not have access to a shell:
# grep -i apache /etc/passwd
If user apache has a default shell (such as /bin/sh), we must change it to /bin/false or /sbin/nologin:
# usermod -s /sbin/nologin apache
The following suggestions (2 through 5) refer to the /etc/httpd/conf/httpd.conf file:
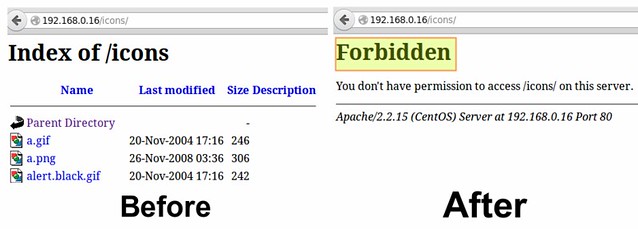
2) Disable directory listing: this will prevent the browser from displaying the contents of a directory if there is no index.html present in that directory.
Delete the word Indexes in the Options directive:
1
2
3
4
5
# The Options directive is both complicated and important.  Please see
# http://httpd.apache.org/docs/2.2/mod/core.html#options
# for more information.
#
Options Indexes FollowSymLinks
Should read:
1
Options None
In addition, you need to make sure that the settings for directories and virtual hosts do not override this global configuration.
Following the example above, if we examine the settings for the /var/www/icons directory, we see that "Indexes MultiViews FollowSymLinks" should be changed to "None".
<Directory "/var/www/icons">
    Options Indexes MultiViews FollowSymLinks
    AllowOverride None
    Order allow,deny
    Allow from all
</Directory>
<Directory "/var/www/icons">
    Options None
    AllowOverride None
    Order allow,deny
    Allow from all
</Directory>
Before After
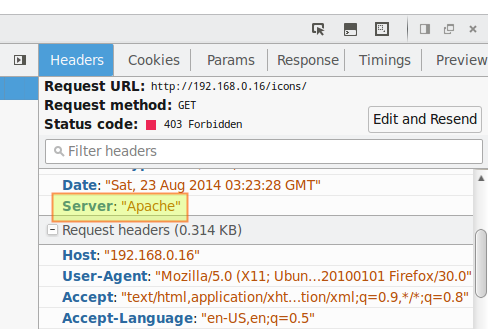
3) Hide Apache version, as well as module/OS information in error (e.g. Not Found and Forbidden) pages.
1
2
ServerTokens Prod # This means that the http response header will return just "Apache" but not its version number
ServerSignature Off # The OS information is hidden
4) Disable unneeded modules by commenting out the lines where those modules are declared:
TIP: Disabling autoindex_module is another way to hide directory listings when there is not an index.html file in them.
5) Limit HTTP request size (body and headers) and set connection timeout:
DirectiveContextExample and meaning
LimitRequestBody server config, virtual host, directory, .htaccess Limit file upload to 100 KiB max. for the uploads directory:
1
2
3
<Directory "/var/www/test/uploads">
   LimitRequestBody 102400
</Directory>
This directive specifies the number of bytes from 0 (meaning unlimited) to 2147483647 (2GB) that are allowed in a request body.
LimitRequestFieldSize server config, virtual host Change the allowed HTTP request header size to 4KiB (default is 8KiB), server wide:
1
LimitRequestFieldSize 4094
This directive specifies the number of bytes that will be allowed in an HTTP request header and gives the server administrator greater control over abnormal client request behavior, which may be useful for avoiding some forms of denial-of-service attacks.
TimeOut server config, virtual host Change the timeout from 300 (default if no value is used) to 120:
1
TimeOut 120
Amount of time, in seconds, the server will wait for certain events before failing a request.
For more directives and instructions on how to set them up, refer to the Apache docs.

Securing MySQL Server

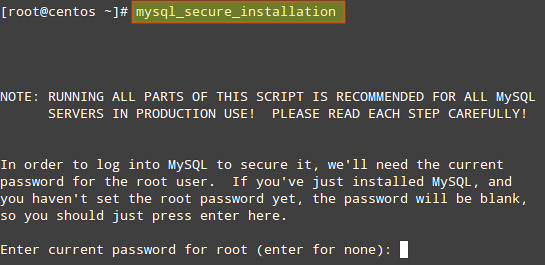
We will begin by running the mysql_secure_installation script which comes with mysql-server package.
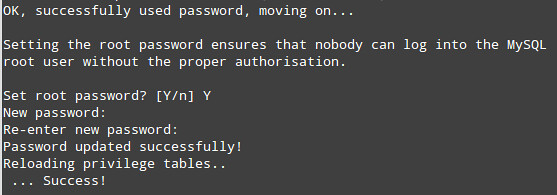
1) If we have not set a root password for MySQL server during installation, now it's the time to do so, and remember: this is essential in a production environment.
The process will continue:
 
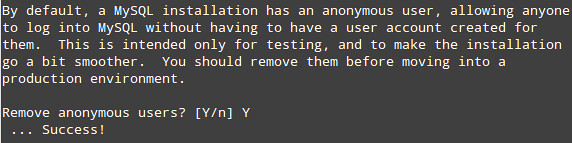
2) Remove the anonymous user:
3) Only allow root to connect from localhost:
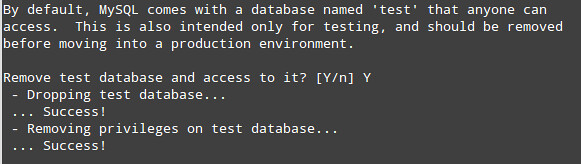
4) Remove the default database named test:
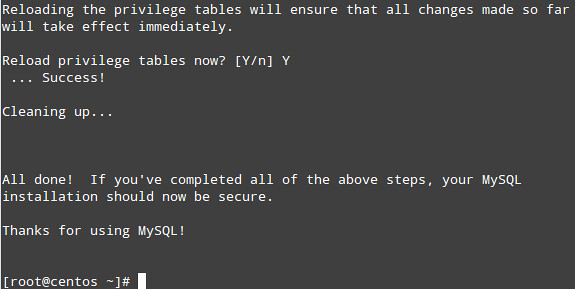
5) Apply changes:

6) Next, we will edit some variables in the /etc/my.cnf file:
1
2
3
4
[mysqld]
bind-address=127.0.0.1 # MySQL will only accept connections from localhost
local-infile=0 # Disable direct filesystem access
log=/var/log/mysqld.log # Enable log file to watch out for malicious activities

Don't forget to restart MySQL server with 'service mysqld restart'.
Now, when it comes to day-to-day database administration, you'll find the following suggestions useful:
  • If for some reason we need to manage our database remotely, we can do so by connecting via ssh to our server first to perform the necessary querying and administration tasks locally.
  • We may want to enable direct access to the filesystem later if, for example, we need to perform a bulk import of a file into the database.
  • Keeping logs is not as critical as the two things mentioned earlier, but may come in handy to troubleshoot our database and/or be aware of unfamiliar activities.
  • DO NOT, EVER, store sensitive information (such as passwords, credit card numbers, bank PINs, to name a few examples) in plain text format. Consider using hash functions to obfuscate this information.
  • Make sure that application-specific databases can be accessed only by the corresponding user that was created by the application to that purpose:
To adjust access permission of MySQL users, use these instructions.
First, retrieve the list of users from the user table:
gacanepa@centos:~$ mysql -u root -p
 
Enter password: [Your root password here]
mysql> SELECT User,Host FROM mysql.user;

 
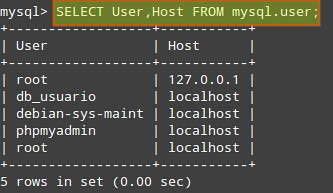
Make sure that each user only has access (and the minimum permissions) to the databases it needs. In the following example, we will check the permissions of user db_usuario:
mysql> SHOW GRANTS FOR 'db_usuario'@'localhost';
 
You can then revoke permissions and access as needed.

Securing PHP

Since this article is oriented at securing the components of the LAMP stack, we will not go into detail as far as the programming side of things is concerned. We will assume that our web applications are secure in the sense that the developers have gone out of their way to make sure that there are no vulnerabilities that can give place to common attacks such as XSS or SQL injection.
1) Disable unnecessary modules:
We can display the list of current compiled in modules with the following command: php -m

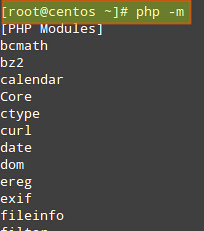
And disable those that are not needed by either removing or renaming the corresponding file in the /etc/php.d directory.
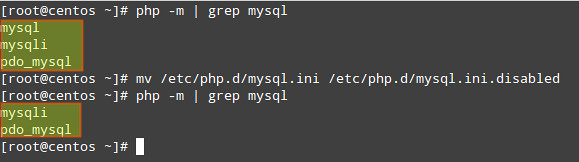
For example, since the mysql extension has been deprecated as of PHP v5.5.0 (and will be removed in the future), we may want to disable it:
# php -m | grep mysql
# mv /etc/php.d/mysql.ini /etc/php.d/mysql.ini.disabled
 

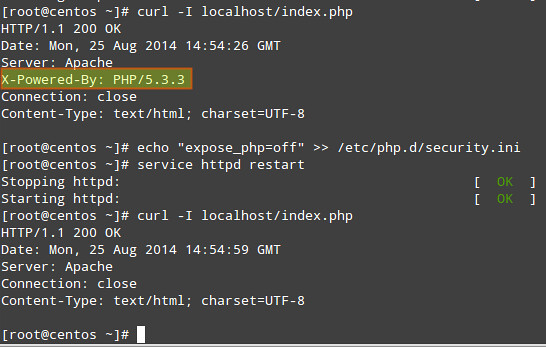
2) Hide PHP version information:
# echo "expose_php=off" >> /etc/php.d/security.ini [or modify the security.ini file if it already exists]
 

3) Set open_basedir to a few specific directories (in php.ini) in order to restrict access to the underlying file system:
 

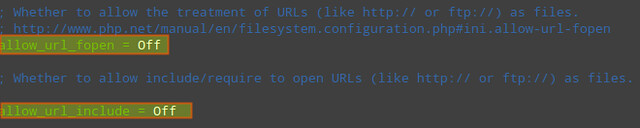
4) Disable remote code/command execution along with easy exploitable functions such as exec(), system(), passthru(), eval(), and so on (in php.ini):
 
1
2
3
allow_url_fopen = Off
allow_url_include = Off
disable_functions = "exec, system, passthru, eval"

Summing Up

1) Keep packages updated to their most recent version (compare the output of the following commands with the output of 'yum info [package]'):
The following commands return the current versions of Apache, MySQL and PHP:
# httpd -v
# mysql -V (capital V)
# php -v

Then 'yum update [package]' can be used to update the package in order to have the latest security patches.
 
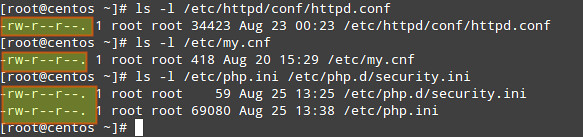
2) Make sure that configuration files can only be written by the root account:
# ls -l /etc/httpd/conf/httpd.conf
# ls -l /etc/my.cnf
# ls -l /etc/php.ini /etc/php.d/security.ini

3) Finally, if you have the chance, run these services (web server, database server, and application server) in separate physical or virtual machines (and protect communications between them via a firewall), so that in case one of them becomes compromised, the attacker will not have immediate access to the others. If that is the case, you may have to tweak some of the configurations discussed in this article. Note that this is just one of the setups that could be used to increase security in your LAMP server.

Referred from Open source article ....

Thursday, 1 March 2012

How to install LAMP stack (Apache, MariaDB/MySQL and PHP) on CentOS

 
 LAMP stack is a popular server-side software stack which is used to build and run dynamic web sites and web applications on Linux platforms. The LAMP stack is composed of Apache (as an HTTP server), MariaDB or MySQL (as a database backend), and PHP, Perl or Python (as a server-side programming language), and hence the acronym "LAMP." Other variants of the LAMP stack exist, such as LEMP (nginx, MySQL, PHP), LAPP (Apache, PostgreSQL, PHP), LLPR (Lighttpd, PostgreSQL, Ruby on Rails), and so forth.


In this tutorial, I describe how to install and set up the LAMP stack with Apache, MariaDB/MySQL and PHP on CentOS server. This tutorial is applicable to CentOS 6 as well as CentOS 7 platforms.

Step One: Apache HTTP Server

As the first step, let's install Apache HTTP server on CentOS. We will also do basic configuration for Apache server afterwards, such as adding Apache service to auto-start list, and opening an HTTP port in the firewall.

Install Apache HTTP Server

$ sudo yum install httpd

Start Apache HTTP Server and Configure Firewall

On CentOS 6.0 and 7.0:
$ sudo systemctl start httpd
$ sudo systemctl enable httpd
$ sudo firewall-cmd --zone=public --add-port=80/tcp --permanent
$ sudo firewall-cmd --reload
On CentOS 6:
$ sudo service httpd start
$ sudo chkconfig httpd on
$ sudo iptables -I INPUT -p tcp -m tcp --dport 80 -j ACCEPT
$ sudo service iptables save

Test Apache HTTP Server

To test the installation, check if httpd daemon is up and running successfully.
On CentOS 7 or onward:
$ sudo systemctl status httpd
 
 
On CentOS 6:
$ sudo service httpd status
httpd (pid  2069) is running...
After confirming the status of httpd, open a web browser, and go to http://<web-server-ip-address> to see if you can load the default Apache web page. The screenshot below shows the default Apache web page on CentOS 6 (192.168.1.8) and CentOS 7 (192.168.1.11).
 
Note that the default document root directory of httpd is /var/www/html on both CentOS 6 and 7. Let's move on to the next step.

Step Two: MariaDB/MySQL

The next step is to set up a database backend for the LAMP stack, for which we have two choices: MySQL and MariaDB. While CentOS/RHEL 6 ships with MySQL server/client packages, CentOS/RHEL 7 moves away from MySQL, and instead offers MariaDB, a community-developed fork of MySQL, as a default database.
 
Below is how to install MariaDB/MySQL server, and set it up to start automatically upon boot.
On CentOS 7:
$ sudo yum install mariadb-server
$ sudo systemctl start mariadb
$ sudo systemctl enable mariadb
On CentOS 6:
 
Install MySQL server/client package, and start MySQL server as follows. 
$ sudo yum install mysql-server
$ sudo service mysqld start
$ sudo chkconfig mysqld on
 
As MariaDB and MySQL are compatible with each other in terms of APIs and command-line usage, the LAMP stack can be configured and operated pretty much the same way regardless of whether you choose MariaDB or MySQL.
 
As a security precaution, run the following add-on script which is included in the MariaDB/MySQL server package.
 
$ sudo mysql_secure_installation
 
 
This script will reconfigure the database server for server hardening purposes. For example, it will change (empty) root password, remove anonymous user, disallow remote root login, and remove a default test database.

Step Three: PHP

The last step in setting up the LAMP stack is to install PHP, a server-side scripting language which is responsible for creating dynamic web pages for users. At a minimum, the LAMP stack requires the following two packages installed.
 
$ sudo yum install php php-mysql
 
The php package adds PHP support to Apache HTTP server, and the php-mysql package allows PHP applications to access MariaDB/MySQL server. Besides those two required packages, there are many other useful PHP modules you can install depending on your requirements. For example:
  • php-gd: needed for image processing in PHP applications.
  • php-odbc: needed for ODBC database access in PHP applications.
  • php-pecl-memcache: needed when setting up Memcached caching daemon.
  • php-pgsql: needed for PostgreSQL database access in PHP applications.
  • php-snmp: needed for querying SNMP-managed devices in PHP applications.
  • php-xml: needed for parsing XML in PHP applications.
  • php-soap: needed to support SOAP protocol in PHP applications.
  • php-xmlrpc: needed to support XML-RPC protocol in PHP applications.
 
You can get a full list of available PHP modules by running:
$ yum search php-
 
Next, let's change the default timezone used by PHP applications. You will need to find out your timezone by using tzselect command.
 
$ tzselect
 
 
After you answer a series of questions, the tzselect will print out your timezone string (e.g., "America/New_York"). Open /etc/php.ini file with a text editor, and add the following line.
date.timezone = "America/New_York"
Don't forget to restart httpd after installing PHP.
 
On CentOS 7:
$ sudo systemctl restart httpd
 
On CentOS 6:
$ sudo service httpd restart
Finally, let's check whether PHP is working properly. For this, use the following command, and check if the output of phpinfo() shows up correctly.
 
$ php -r "phpinfo();" | more
 
Once you verify PHP command-line output, let's create a test PHP file as follows, and verify that the PHP file is loaded successfully by Apache HTTP server.
$ sudo vi /var/www/html/test.php
1
<?php phpinfo(); ?>
 
Go to http://<web-server-ip-address>/test.php in your web browser. You should see the following output.
 
Now you have successfully set up the LAMP stack!
 

Saturday, 24 April 2010

How to set up Samba as a Primary Domain Controller ...

How to set up Samba as a Primary Domain Controller   

A domain controller is a server which groups multiple computers to centralize their authentication system. When you are using a domain controller, you don't login to your computer, but instead login to the domain controller. Every authentication request is handled by the Primary Domain Controller (PDC).
 
Usually you hear about PDC using a Windows based server. In this tutorial, I'll describe how to set up a PDC using Samba, which is based on Linux.
 
There are four main steps for setting up Samba as a PDC:
  • Install Samba
  • Configure /etc/samba/smb.conf
  • Add domain users
  • Register all Windows computers with Samba PDC.

1. Samba Installation

If you are using a Debian based Linux, run the following command on the terminal window to install Samba:
$ sudo apt-get install samba
$ sudo apt-get install samba-common
$ sudo apt-get install samba-common-bin
 
If you are using a Red Hat based Linux, you may use rpm or yum package manager to install Samba.

2. Samba Configuration

The main configuration of Samba server is found in /etc/samba/smb.conf. For a PDC server, there are three part of the file which you need to configure: global, netlogon, and homes.
Before you start modifying the configuration file, I suggest you back up the existing Samba configuration file.
$ sudo cp /etc/samba/smb.conf /etc/samba/smb.conf.old

Configuring [global] parameters

[global]
 workgroup = sambadomain 
 netbios name = sambapdc 
 server string = Samba PDC 
 domain master = yes 
 preferred master = yes 
 domain logons = yes 
 add machine script = /usr/sbin/useradd -N -g machines -c Machine -d /var/lib/samba -s /bin/false %u 
 security = user 
 encrypt passwords = yes 
 wins support = yes 
 name resolve order = wins lmhosts hosts bcast 

 logon path = \\%N\%U\profile 
 logon drive = H: 
 logon home = \\%N\%U
Change the names of the workgroup and the PDC according to your environment, so that they correspond to the actual values in your network. If you have another Wins server on your network, remove "wins support = yes", because having more than one causes a problem. "wins support = yes" means Samba acting as a Netbios server.

Creating LMHOSTS file

Don't forget to register your domain IP address to the LMHOSTS file. The LMHOSTS file is a mapper between the IP address of the domain controller and Netbios name. When you add a Windows computer to the SAMBADOMAIN, Windows tries to find the PDC's IP address. If Windows fails to find the PDC's IP address, then you won't be able to register a computer with the PDC.
The LMHOSTS file should be created and placed in /etc/samba/lmhosts. The content of LMHOSTS file is similar to /etc/resolv.conf file, except that you need to register the Netbios name instead of the host name. For example, if your PDC has an IP address 10.10.101.1 with sambadomain as workgroup name, and sambapdc as the Netbios name, the content of the lmhosts file should look like the following:
10.10.101.1 sambadomain
10.10.101.1 sambapdc
After creating /etc/samba/lmhosts, re-run the nmbd daemon as follows:
$ sudo nmbd -H /etc/samba/lmhosts -D

Configuring [netlogon] parameters

[netlogon]
 path = /var/lib/samba/netlogon 
 browseable = no 
 read only = no 
 create mask = 0700 
 directory mask = 0700 
 valid users = %S 

/var/lib/samba/netlogon is a startup directory for PDC logon. When users login to the Samba PDC, a script called netlogon.bat in the directory will be executed.

$ sudo mkdir -m 0755 /var/lib/samba/netlogon
 
For example, if you want to automatically mount a network drive from the PDC, Create the following netlogon.bat script in /var/lib/samba/netlogon
1
2
## Samba Logon Script
net use x: \\sambapdc\share

Configuring [homes] parameters

This is a configuration file for PDC user's home directory.
[homes]
 valid users = %S 
 guest ok = yes 
    read only = yes 

Testing the configuration file

After saving all configuration files, test your configuration with the following command:
$ sudo testparm
If there is any syntax error detected, fix it and restart Samba.

3. Adding Domain Users

Adding admin user and group for the PDC

In Linux, admin user is the root user. So you need to run the following command to add the root user as the Samba admin:
$ sudo smbpasswd root
You should not use the same password as the Linux root user.

Create a machines group

The next step is to create a group called "machines".
$ sudo groupadd -g machines
Samba will automatically add users to this group, as long as you configure "add machine script" correctly in [global] section in /etc/samba/smb.conf.

Create a Linux Account for PDC login

You need to create a user on PDC for domain login. In this example, I will create an account that disables Linux login. So every access to the PDC must be done via Samba.
For example, creating user "arsalan":
$ sudo smbpasswd -a arsalan
Enter the same password twice.
You need to activate the user with the following command:
$ sudo smbpasswd -e dan
Grant user "arsalan" to login to the PDC:
$ sudo net rpc rights grant "SAMBADC\dan" SeMachineAccountPrivilege SePrintOperatorPrivilege SeAddUsersPrivilege SeDiskOperatorPrivilege SeRemoteShutdownPrivilege
$ sudo net groupmap add ntgroup="Administrator" unixgroup=root rid=512 type=d

4. Register Windows Computers with the Samba PDC

Under Windows computer properties, change the domain name to sambadomain. Reboot your Windows PC, and try to login with SAMBADC/arsalan. If you successfully login, then your Samba PDC is ready.

Referred from open source article

Saturday, 10 April 2010

How to set up a Samba file server to use with Windows clients

According to the Samba project web site, Samba is an open source/free software suite that provides seamless file and print services to SMB/CIFS clients. Unlike other implementations of the SMB/CIFS networking protocol (such as LM Server for HP-UX, LAN Server for OS/2, or VisionFS), Samba (along with its source code) is freely available (at no cost to the end user), and allows for interoperability between Linux/Unix servers and Windows/Unix/Linux clients.
For these reasons, Samba is the preferred solution for a file server in networks where different operating systems (other than Linux) coexist - the most common setup being the case of multiple Microsoft Windows clients accessing a Linux server where Samba is installed, which is the situation we are going to deal with in this article.
 
Please note that on the other hand, if our network consists of only Unix-based clients (such as Linux, AIX, or Solaris, to name a few examples), we can consider using NFS (although Samba is still an option in this case), which has greater reported speeds.
 

Installing Samba in Debian and CentOS/Redhat

Before we proceed with the installation, we can use our operating system's package management system to look for information about Samba:

On Debian:
# aptitude show samba
 
On CentOS:
# yum info samba
 
In the following screenshot we can see the output of 'aptitude show samba' ('yum info samba' yields similar results):


Now let's install Samba (the screenshot below corresponds to the installation on a Debian 7 [Wheezy] server):

On Debian:
# aptitude install samba
 
On CentOS:
# yum install samba 
 

Adding Users to Samba

For versions earlier than 4.x, a local Unix account is required for adding users to Samba:
# adduser -s /dev/null -m -d /home/<username> <username>


# SAMBA SHARE
[xmodulo]
path = /home/xmodulo
available = yes
valid users = xmodulo
read only = no
browseable = yes
public = yes
writeable = yes
 

  , Linux Sys Administrator 
He is a GNU/Linux sysadmin and web developer from Villa Mercedes, San Luis, Argentina. He works for a worldwide leading consumer product company and takes great pleasure in using FOSS tools to increase productivity in all areas of his daily work.

Saturday, 7 November 2009

Advanced SSH security tips and tricks

The SSH server configuration file is located in /etc/ssh/sshd_conf. You need to restart the SSH service after every change you make to that file in order for changes to take effect.

Change SSH listening port
By default, SSH listens for connections on port 22. Attackers use port scanner software to see whether hosts are running an SSH service. It's wise to change the SSH port to a number higher than 1024 because most port scanners (including nmap) by default don't scan high ports.
Open the /etc/ssh/sshd_config file and look for the line that says:
Port 22
Change the port number and restart the SSH service:
/etc/init.d/ssh restart

Allow only SSH protocol 2
There are two versions of the SSH protocol. Using SSH protocol 2 only is much more secure; SSH protocol 1 is subject to security issues including man-in-the-middle and insertion attacks. Edit /etc/ssh/sshd_config and look for the line that says:
Protocol 2,1
Change the line so it says only protocol 2.

Allow only specific users to log in via SSH
You should not permit root logins via SSH, because this is a big and unnecessary security risk. If an attacker gains root login for your system, he can do more damage than if he gains normal user login. Configure SSH server so that root user is not allowed to log in. Find the line that says:
PermitRootLogin yes

Change yes to no and restart the service. You can then log in with any other defined user and switch to user root if you want to become a superuser.

It is wise to create a dummy local user with absolutely no rights on the system and use that user to login into SSH. That way no harm can be done if the user account is compromised. When creating this user, make sure it's in the wheel group, so that you can switch to superuser.
If you would like to have a list of users who are the only ones able to log in via SSH, you can specify them in the sshd_config file. For example, let's say I want to allow users anze, dasa, and kimy to log in via SSH. At the end of sshd_config file I would add a line like this:
AllowUsers anze dasa kimy

Create a custom SSH banner
If you would like any user who connects to your SSH service to see a specific message, you can create a custom SSH banner. Simply create a text file (in my example in /etc/ssh-banner.txt) and put any kind of text message in it; for example:

*****************************************************************
*This is a private SSH service. You are not supposed to be here.*
*Please leave immediately. *
*****************************************************************

When done editing, save the file. In the sshd_conf file, find a line that says:
#Banner /etc/issue.net

Uncomment the line and change the path to your custom SSH banner text file.

Using DSA public key authentication

Instead of using login names and passwords for SSH authentication, you can use DSA public keys for authentication. Note that you can have both login names and DSA public key authentication enabled at the same time. Having a DSA public keys authentication enabled makes your system bulletproof against dictionary attacks, because you don't need a login name and password to log in into SSH service. Instead, you need a pair of DSA keys -- one public and one private. You keep the private key on your machine and copy the public key to the server. When you want to log in to an SSH session, the server checks the keys, and if they match, you are dropped into the shell. If the keys don't match, you are disconnected.

In this example the private machine (from which I will connect to the server) is station1 and the server machine is server1. On both machines I have the same home folder; this won't work if the home folders are different on client and server machine. First you need to create a pair of keys on your private machine with the command ~$ ssh-keygen -t dsa. You'll be prompted for a pass-phrase for your private key, but you can leave it blank because this is not a recommended method. A key pair is generated: your private key is located in ~/.ssh/id_dsa and your public key is located in .ssh/id_dsa.pub.

Next, copy the contents of ~/.ssh/id_dsa.pub to server1 into the ~/.ssh/authorized_keys file. The content of ~/.ssh/id_dsa.pub file should look something like this:
~$ cat .ssh/id_dsa.pub

 ssh-dss AAAAB3NzaC1kc3MAAACBAM7K7vkK5C90RsvOhiHDUROvYbNgr7YEqtrdfFCUVwMWcJYDusNG
AIC0oZkBWLnmDu+y6ZOjNPOTtPnpEX0kRoH79maX8NZbBD4aUV91lbG7z604ZTdrLZVSFhCI/Fm4yROH
Ge0FO7FV4lGCUIlqa55+QP9Vvco7qyBdIpDuNV0LAAAAFQC/9ILjqII7nM7aKxIBPDrQwKNyPQAAAIEA
q+OJC8+OYIOeXcW8qcB6LDIBXJV0UT0rrUtFVo1BN39cAWz5puFe7eplmr6t7Ljl7JdkfEA5De0k3WDs
9/rD1tJ6UfqSRc2qPzbn0p0j89LPIjdMMSISQqaKO4m2fO2VJcgCWvsghIoD0AMRC7ngIe6btaNIhBbq
ri10RGL5gh4AAACAJj1/rV7iktOYuVyqV3BAz3JHoaf+H/dUDtX+wuTuJpl+tfDf61rbWOqrARuHFRF0
Tu/Rx4oOZzadLQovafqrDnU/No0Zge+WVXdd4ol1YmUlRkqp8vc20ws5mLVP34fST1amc0YNeBp28EQi
0xPEFUD0IXzZtXtHVLziA1/NuzY= 


If the file ~/.ssh/authorized_keys already exists, append the contents of the file ~/.ssh/id_dsa.pub to the file ~/.ssh/authorized_keys on server1. The only thing left to do is to set the correct permissions of ~/.ssh/authorized_keys file on server1:

~$ chmod 600 ~/.ssh/authorized_keys

Now, configure the sshd_conf file to use the DSA keys authentication. Make sure you have the following three lines uncommented:

RSAAuthentication yes
PubkeyAuthentication yes
AuthorizedKeysFile %h/.ssh/authorized_keys


Restart the service. If you configured everything correctly, you should now be able to SSH to your server and fall directly into your home folder without any interaction.
If you would like to use DSA authentication only, make sure you uncomment and change the

PasswordAuthentication line in sshd_config from yes to no:
PasswordAuthentication no

If anyone tries to connect to your SSH service and doesn't have a public key on the server, he will be rejected without even seeing the login prompt with this error:
Permission denied (publickey).

Using TCP wrappers to allow only specific hosts to connect
This approach is useful if you would like to allow only specific hosts on a network to be able to connect to your SSH service, but you don't want to use or mess up your iptables configuration. Instead, you can use TCP wrappers; in this case the sshd TCP wrapper. I will make a rule to allow only hosts on my local subnet 192.168.1.0/24 and remote host 193.180.177.13 to connect to my SSH service.

By default TCP wrappers first look in the /etc/hosts.deny file to see what hosts are denied for what service. Next, TCP wrapper looks in /etc/hosts.allow file to see if there are any rules that would allow hosts to connect to a specific service. I'll create a rule like this in /etc/hosts.deny:
sshd: ALL

This means that by default all hosts are forbidden to access the SSH service. This needs to be here, otherwise all hosts would have access to the SSH service, since TCP wrappers first looks into hosts.deny file and if there is no rule regarding blocking SSH service, any host can connect.
Next, create a rule in /etc/hosts.allow to allow only specific hosts (as defined earlier) to use the SSH service:
sshd: 192.168.1 193.180.177.13

Now only hosts from the 192.168.1.0/24 network and the 193.180.177.13 host can access the SSH service. All other hosts are disconnected before they even get to the login prompt, and receive an error like this:

ssh_exchange_identification: Connection closed by remote host

Using iptables to allow only specific hosts to connect
An alternative to TCP wrappers (although you can use both at the same time) is limiting SSH access with iptables. Here's a simple example of how you can allow only a specific host to connect to your SSH service:

~# iptables -A INPUT -p tcp -m state --state NEW --source 193.180.177.13 --dport 22 -j ACCEPT

And make sure no one else has access to SSH service:

~# iptables -A INPUT -p tcp --dport 22 -j DROP
Save your new rules and you're all done.

SSH time-lock tricks

You can also use different iptables parameters to limit connections to the SSH service for specific time periods. You can use the /second, /minute, /hour, or /day switch in any of the following examples.

In the first example, if a user enters the wrong password, access to the SSH service is blocked for one minute, and the user gets only one login try per minute from that moment on:

~# iptables -A INPUT -p tcp -m state --syn --state NEW --dport 22 -m limit --limit 1/minute --limit-burst 1 -j ACCEPT
~# iptables -A INPUT -p tcp -m state --syn --state NEW --dport 22 -j DROP


In a second example, iptables are set to allow only host 193.180.177.13 to connect to the SSH service. After three failed login tries, iptables allows the host only one login try per minute:

~# iptables -A INPUT -p tcp -s 193.180.177.13 -m state --syn --state NEW --dport 22 -m limit --limit 1/minute --limit-burst 1 -j ACCEPT
~# iptables -A INPUT -p tcp -s 193.180.177.13 -m state --syn --state NEW --dport 22 -j DROP


Conclusion

These features are not hard to configure, but they are very powerful techniques for securing your SSH
service. It's a small price to pay for a good night's sleep.

Sunday, 8 February 2009

What CLI tools you must know as a Linux system admins

What CLI tools you must know as a Linux system admin

System administrators (sysadmins) are responsible for day-to-day operations of production systems and services. One of the critical roles of sysadmins is to ensure that operational services are available round the clock. For that, they have to carefully plan backup policies, disaster management strategies, scheduled maintenance, security audits, etc. Like every other discipline, sysadmins have their tools of trade. Utilizing proper tools in the right case at the right time can help maintain the health of operating systems with minimal service interruptions and maximum uptime.
 
 
This blog post will present some of the most popular and useful CLI tools recommended for sysadmins in their day to day activities. If you would like to recommend any useful tool which is not listed here, don't forget to share it in the comment section.

Network Tools

1. ping: Check end-to-end connectivity (RTT delay, jitter, packet loss) of a remote host with ICMP echo/reply. Useful to check system status and reachability.
 
2. hping: Network scanning and testing tool that can generate ICMP/TCP/UDP ping packets. Often used for advanced port scanning, firewall testing, manual path MTU discovery and fragmentation testing.
 
3. traceroute: Discover a layer-3 forwarding path from a local host to a remote destination host with TTL-limited ICMP/UDP/TCP probe packets. Useful to troubleshoot network reachability and routing problems.
 
4. mtr: A variation of traceroute which characterizes per-hop packet loss/jitter with running statistics. Useful to characterize routing path delays.
 
5. netcat/socat: A swiss army knife of TCP/IP networking, allowing to read/write byte streams over TCP/UDP. Useful to troubleshoot firewall policies and service availability.
 
6. dig: DNS troubleshooting tool that can generate forward queries, reverse queries, find authoritative name servers, check CNAME, MX and other DNS records. Can be instructed to query a specific DNS server of your choosing.
 
7. nslookup: Another DNS checking/troubleshooting tool. Works with all DNS queries and records. Can query a particular DNS server.
 
8. dnsyo: A DNS testing tool which checks DNS propagation by performing DNS lookup from over a number of open resolvers located across 1,500 different networks around the world.
 
9. lsof: Show information about files (e.g., regular files, pipes or sockets) which are opened by processes. Useful to monitor processes or users in terms of their open network connections or opened files.
 
10. iftop: A ncurses-based TUI utility that can be used to monitor in real time bandwidth utilization and network connections for individual network interfaces. Useful to keep track of bandwidth hogging applications, users, destinations and ports.
 
11. netstat: A network statistics utility that can show status information and statistics about open network connections (TCP/UDP ports, IP addresses), routing tables, TX/RX traffic and protocols. Useful for network related diagnosis and performance tuning.
 
12. tcpdump: A popular packet sniffer tool based on libpcap packet capture library. Can define packet capturing filters in Berkeley Packet Filters format.
 
13. tshark: Another CLI packet sniffer software with full compatibility with its GUI counterpart, Wireshark. Supports 1,000 protocols and the list is growing. Useful to troubleshoot, analyze and store information on live packets.
 
14. ip: A versatile CLI networking tool which is part of iproute2 package. Used to check and modifying routing tables, network device state, and IP tunneling settings. Useful to view routing tables, add/remove static routes, configure network interfaces, and otherwise troubleshoot routing issues.
 
15. ifup/ifdown: Used to bring up or shut down a particular network interface. Often a preferred alternative to restarting the entire network service.
 
16. autossh: A program which creates an SSH session and automatically restarts the session should it disconnect. Often useful to create a persistent reverse SSH tunnel across restrictive corporate networks.
 
17. iperf: A network testing tool which measures maximum bi-directional throughput between a pair of hosts by injecting customizable TCP/UDP data streams in between.
 
18. elinks/lynx: text-based web browsers for CLI-based server environment.

Security Tools

19. iptables: A user-space CLI tool for configuring Linux kernel firewall. Provides means to create and modify rules for incoming, transit and outgoing packets within Linux kernel space.
 
20. nmap: A popular port scanning and network discovery tool used for security auditing purposes. Useful to find out which hosts are up and running on the local network, and what ports are open on a particular host.
 
21. TCP Wrappers: A host-based network ACL tool that can be used to filter incoming/outgoing reqeuests/replies. Often used alongside iptables as an additional layer of security.
 
22. getfacl/setfacl: View and customize access control lists of files and directories, as extensions to traditional file permissions.
 
23. cryptsetup: Used to create and manage LUKS-encrypted disk partitions.
 
24. lynis: A CLI-based vulnerability scanner tool. Can scan the entire Linux system, and report potential vulnerabilities along with possible solutions.
 
25. maldet: A malware scanner CLI tool which can detect and quarantine potentially malware-infected files. Can run as a background daemon for continuous monitoring.
 
26. rkhunter/chkrootkit: CLI tools which scan for potential rootkits, hidden backdoors and suspected exploits on a local system, and disable them.

Storage Tools

27. fdisk: A disk partition editor tool. Used to view, create and modify disk partitions on hard drives and removable media.
 
28. sfdisk: A variant of fdisk which accesses or updates a partition table in a non-interactive fashion. Useful to automate disk partitioning as part of backup and recovery procedure.
 
29. parted: Another disk partition editor which can support disk larger than 2TB with GPT (GUID Partitioning Table). Gparted is a GTK+ GUI front-end of parted.
 
30. df: Used to check used/available storage and mount point of different partitions or file directories. A user-friendly variant dfc exists.
 
31. du: Used to view current disk usage associated with different files and directories
(e.g., du -sh *).
32. mkfs: A disk formatting command used to build a filesystem on individual disk partitions. Filesystem-specific versions of mkfs exist for a number of filesystems including ext2, ext3, ext4, bfs, ntfs, vfat/fat.
 
33. fsck: A CLI tool used to check a filesystem for errors and repair where possible. Typically run automatically upon boot when necessary, but also invoked manually on demand once unmounting a partition.
 
34. mount: Used to map a physical disk partition, network share or remote storage to a local mount point. Any read/write in the mount point makes actual data being read/written in the corresponding actual storage.
 
35. mdadm: A CLI tool for managing software RAID devices on top of physical block devices. Can create, build, grow or monitor RAID array.
 
36. lvm: A suite of CLI tools for managing volume groups and physical/logical volumes, which allows one to create, resize, split and merge volumes on top of multiple physical disks with minimum downtime.

Log Processing Tools

37. tail: Used to monitor trailing part of a (growing) log file. Other variants include multitail (multi-window monitoring) and ztail (inotify support and regex filtering and coloring).
 
38. logrotate: A CLI tool that can split, compress and mail old/large log files in a pre-defined
 
interval. Useful for administration of busy servers which may produce a large volume of log files.
39. grep/egrep: Can be used to filter log content for a particular pattern or a regular expression. Variants include user-friendly ack and faster ag.
 
40. awk: A versatile text scanning and processing tool. Often used to extract certain columns or fields from text/log files, and feed the result to other tools.
 
41. sed: A text stream editor tool which can filter and transform (e.g., remove line/whitespace, substitute/convert a word, add numbering) text streams and pipeline the result to stdout/stderr or another tool.

Backup Tools

42. rsync: A fast one-way incremental backup and mirroring tool. Often used to replicate a data repository to an offsite storage, optionally over a secure connection such as SSH or stunnel.
 
43. rdiff-backup: Another bandwidth-efficient, incremental backup tool. Maintains differential of two consecutive snapshots.
 
44. duplicity: An encrypted incremental backup utility. Uses GnuPG to encrypt a backup, and transfers to a remote server over SSH.

Performance Monitoring Tools

45. top: A CLI-based process viewer program. Can monitor system load, process states, CPU and memory utilization. Variants include more user-friendly htop.
 
46. ps: Shows a snapshot of all running processes in the system. The output can be customized to show PID, PPID, user, load, memory, cumulative user/system time, start time, and more. Variants include pstree which shows processes in a tree hierarchy.
 
47. nethogs: A bandwidth monitoring tool which groups active network connections by processes, and reports per-process (upload/download) bandwidth consumption in real-time.
 
48. ngxtop: A web-server access log parser and monitoring tool whose interface is inspired by top command. It can report, in real time, a sorted list of web requests along with frequency, size, HTTP return code, IP address, etc.
 
49. vmstat: A simple CLI tool which shows various run-time system properties such as process count, free memory, paging status, CPU utilization, block I/O activities, interrupt/context switch statistics, and more.
 
50. iotop: An ncurses-based I/O monitoring tool which shows in real time disk I/O activities of all running processes in sorted order.
 
51. iostat: A CLI tool which reports current CPU utilization, as well as device I/O utilization, where I/O utilization (e.g., block transfer rate, byte read/write rate) is reported on a per-device or per-partition basis.
 
52. sysdig: A versatile and comprehensive open source tool for capturing and analyzing system behavior and server state in both real-time and offline modes.

Productivity Tools

53. screen: Used to split a single terminal into multiple persistent virtual terminals, which can also be made accessible to remote users, like teamviewer-like screen sharing.
 
54. tmux: Another terminal multiplexer tool which enables multiple persistent sessions, as well as horizontal/vertial splits of a terminal.
 
55. cheat: A simple CLI tool which allows you to read cheat sheets of many common Linux commands, conveniently right at your fingertips. Pre-built cheat sheets are fully customizable.
 
56. apropos: Useful when you are searching man pages for descriptions or keywords.

Package Management Tools

57. apt: The de facto package manager for Debian based systems like Debian, Ubuntu, Backtrack or elementary OS. A life saver.
 
58. apt-fast: A supporting utility for apt-get, which can significantly improve apt-get's download speed by using multiple concurrent connections.
 
59. apt-file: Used to find out which .deb package a specific file belongs to, or to show all files in a particular .deb package. Works on both installed and non-installed packages.
 
60. dpkg: A CLI utility to install a .deb package manually. Highly advised to use apt whenever possible.
 
61. yum: The de facto automatic package manager for Red Hat based systems like RHEL, CentOS or Fedora. Yet another life saver.
 
62. rpm: Typically I use rpmyum something. Has some useful parameters like -q, -f, -l for querying, files and locations, respectively.

Hardware Tools

63. lspci: A command line tool which shows various information about installed PCI devices, such as model names, device drivers, capabilities, memory address, PCI bus address.
 
64. lshw: A command line tool which queries and displays detailed information of hardware
configuration in various categories (e.g., processor, memory, motherboard, network, video, storage). Supports multiple output formats: html, xml, json, text.
 
65. inxi: A comprehensive hardware reporting tool which gives an overview of various hardware components such as CPU, graphics card, sound card, network card, temperature/fan sensors, etc.
If you would like to recommend any useful tool which is not listed here, feel free to share it in the comment section.